Have you ever wondered how to make your home smart and automated without breaking the bank? We’re thrilled to say that with a Raspberry Pi and Home Assistant, you can achieve seamless home automation effortlessly. We’ve been blogging about Home Automation and Smart Gadgets for the past eight years, and today, we’re excited to share our knowledge with you in a friendly and engaging way.
Why Choose Home Assistant and Raspberry Pi for Home Automation?
Affordable Home Automation
Starting with a smart home setup might sound pricey, but that’s not necessarily true. When it comes to home automation, we get it – cost matters. That’s why using a Raspberry Pi and Home Assistant is a game-changer. You get to automate your home without burning a hole in your pocket.
Flexibility and Customization
Home Assistant offers incredible flexibility and customization. Want to automate your lights, thermostat, or even your coffee maker? You can do all that and more. The best part? You tailor it to fit your specific needs.
Community and Support
One thing we truly appreciate is the vibrant community surrounding Home Assistant and Raspberry Pi. Whether you’re troubleshooting an issue or looking for new automation ideas, the community has got your back. It’s like having a group of tech-savvy friends ready to help out.
Getting Started: What You’ll Need
Alright, so you’ve decided to jump into the world of Home Assistant on a Raspberry Pi. Here’s a quick list of essentials to get you started:
- Raspberry Pi (preferably 3B+ or newer)
- microSD card (16GB or larger)
- Power supply
- Ethernet cable or Wi-Fi
- Home Assistant image for Raspberry Pi
- Optional: USB Zigbee/Z-Wave stick for additional device compatibility
Got everything? Fantastic! Let’s roll.
Preparing Your Raspberry Pi
Getting your Raspberry Pi ready is as easy as pie. First, download the Home Assistant image from their official website. Use tools like balenaEtcher to flash the image onto your microSD card. Slide that microSD card into your Raspberry Pi, connect your power supply, and voila!
Setting Up Home Assistant
Once your Raspberry Pi boots up, you should be able to access Home Assistant via your web browser. Open a browser and type in http://homeassistant.local:8123. Follow the on-screen instructions to complete the setup. Easy peasy, right?
Adding Devices and Automations
Integrating Smart Devices
One of the coolest things about Home Assistant is its compatibility with a myriad of smart devices. From Philips Hue to Google Nest, you name it. Adding devices is often as simple as entering your credentials or following a pairing process.
Here’s a table to illustrate some popular integrations:
| Device Category | Popular Brands/Models | Integration Method |
|---|---|---|
| Smart Lights | Philips Hue, LIFX | API Key, Device Pairing |
| Thermostats | Google Nest, Ecobee | Account Linking |
| Security Cameras | Ring, Arlo | API Key, Stream URL |
| Voice Assistants | Amazon Alexa, Google Assistant | Account Linking |
Creating Automations
Now, let’s get to the fun part – automations. Imagine your lights dimming automatically when you start a movie or your thermostat adjusting itself based on your routine. Here’s how you can create simple automations:
- Navigate to Automations in Home Assistant Interface
- Click on “Add New Automation”
- Choose Triggers and Conditions
Let’s create a scenario: You want the lights to turn on when you arrive home. Your trigger will be your location (when you enter a certain area), and your action will be turning the lights on.
User Stories for Inspiration
Remember Jane from the neighborhood? She’s got a neat setup where her outdoor lights turn on automatically at sunset, and her thermostat adjusts throughout the day based on her work schedule. There’s also Mark, whose coffee maker starts brewing just as he finishes his morning shower. The possibilities are endless, and inspiration is everywhere.
Troubleshooting Common Issues
Connectivity Problems
Let’s be real, tech doesn’t always cooperate. If you face connectivity problems, first ensure your Raspberry Pi and smart devices are on the same network. Restarting the devices often helps too.
Here’s a quick troubleshooting table:
| Issue | Possible Solutions |
|---|---|
| Raspberry Pi not visible | Check network, reboot Pi, verify SD card image |
| Devices not pairing | Ensure compatibility, check Wi-Fi settings, reboot |
| Unresponsive Automations | Verify triggers/conditions, check logs, test manually |
Software Updates
Keeping your Home Assistant and Raspberry Pi updated is crucial for smooth operation. Regular updates bring new features, enhance security, and fix bugs. Always backup your configurations before updating.
Enhancing Your Home Automation Experience
Voice Assistants Integration
Who wouldn’t love controlling their home with their voice? Integrate Amazon Alexa or Google Assistant with Home Assistant for a hands-free experience. Simply link your Home Assistant account with your voice assistant, and you’re all set.
User-Generated Content for Ideas
Want to see what others are doing? Check out online forums and user groups. People love sharing their setups, and you might stumble upon ideas that fit perfectly with your home automation vision.
Using Zigbee/Z-Wave for More Device Options
Expanding your automation universe is totally feasible with Zigbee and Z-Wave. These USB sticks allow you to connect even more devices seamlessly. Imagine the fun of exploring more gadgets and integrating them into your smart home.
Security and Privacy Considerations
Keeping Your Network Secure
Given that your smart home is connected to the internet, it’s essential to keep your network secure. Change default passwords, use strong, unique passwords for all devices, and regularly update your firmware.
Data Privacy
Home Assistant offers excellent data privacy since it runs locally on your Raspberry Pi, minimizing the need for cloud services. You control your data, which is a significant peace of mind.
Leveraging Feedback from Our Community
Our community’s feedback has been invaluable over the years. Users often share what worked, what didn’t, and their creative automation ideas. We highly encourage engaging with them. Share your experiences, and you might even find solutions to problems you haven’t encountered yet.
Conclusion
So, are you ready to transform your home into a futuristic smart haven? We’re here to help every step of the way. Try setting up Home Assistant on your Raspberry Pi and let us know how it goes. Got questions or cool automations to share? Reach out to us and join our friendly community of smart home enthusiasts.
Our smart journey has been incredibly fun and rewarding, and we can’t wait for you to experience it too. Let’s make our homes smarter, one Raspberry Pi at a time.
Related Products…
-
 CanaKit Raspberry Pi 4 Starter Kit$119.99
 -
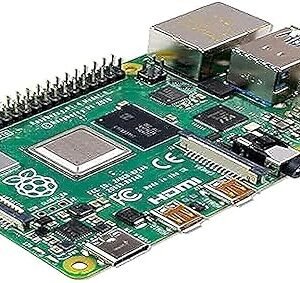 Raspberry Pi 4 Model B 4GB$64.18
 -
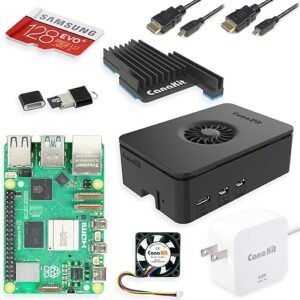 CanaKit Raspberry Pi 5 Pro Kit – Black$159.99

